Here you can find more information to help you edit your membership account, edit your online user profile, change your photo, and more. We currently have three different how-to guides to assist members who may have questions. You can either scroll down through the help topics, or jump directly to one below. If you can’t find an answer to your question let us know on our contact page, and we will help answer any questions you may have. Make sure you are logged in, otherwise you will not be able to see your account.
Guide 1: Membership Information
Guide 2: Editing Account Profile
Guide 3: Editing User Profile
How-to Guide #1 – Membership Information
Q: How do I check my Society membership account information?
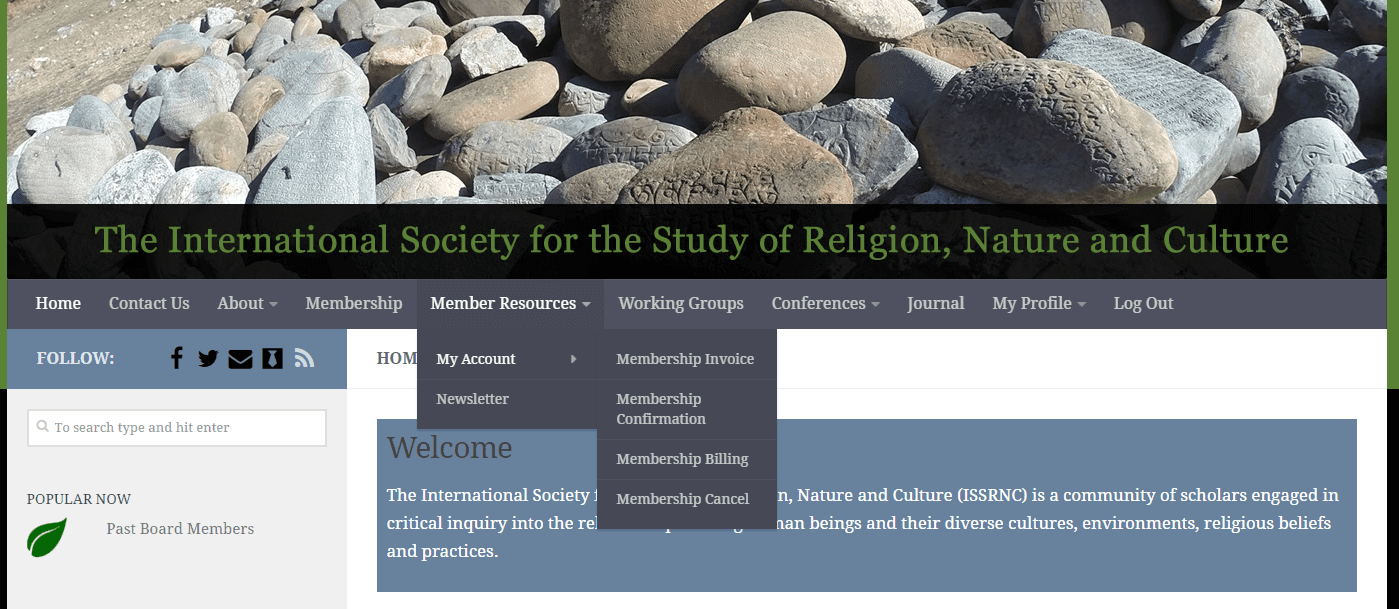
A: All information about your ISSRNC account and membership can be found under the “Member Resources” tab in the main menu. Click the “Member Resources” tab to view the drop-down, and select “My Account”.
Once you are on the My Account page, you should see a screen like the one shown below with all of the details about your current and past memberships.
From this screen you can Renew, Change or Cancel your current ISSRNC membership under the “My Memberships” section. This will show you your current membership level, the cost, and when it expires.
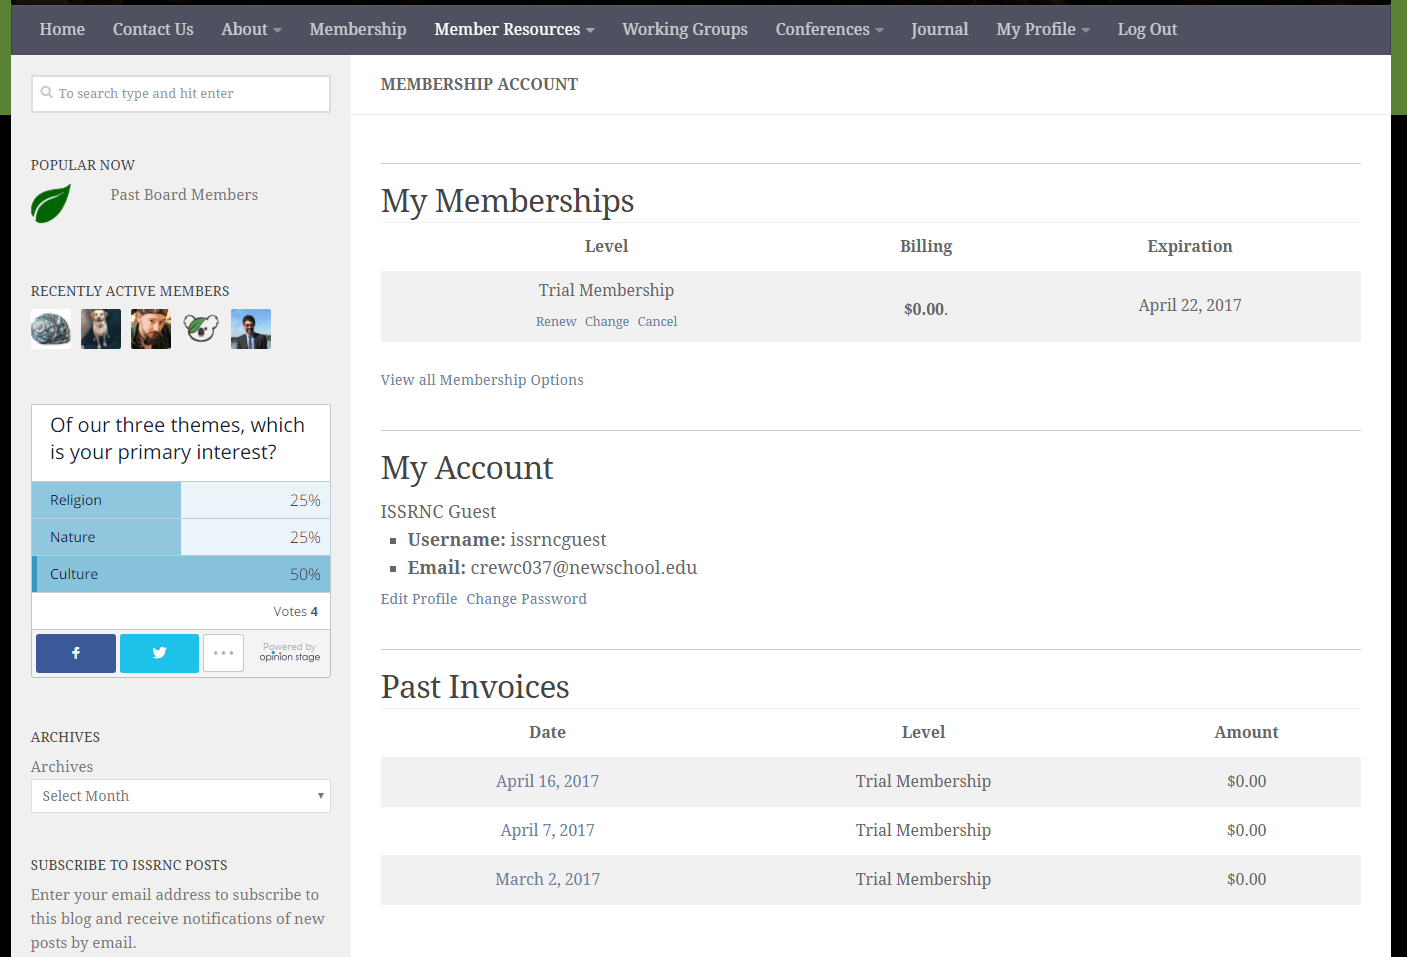
Clicking on “View all Membership Options” will take you to the membership levels page, where you can view all of the different ISSRNC membership levels that are available.
Under the “My Account” section you have the option to “Edit Profile”, “Change Password” and see “Past Invoices.”
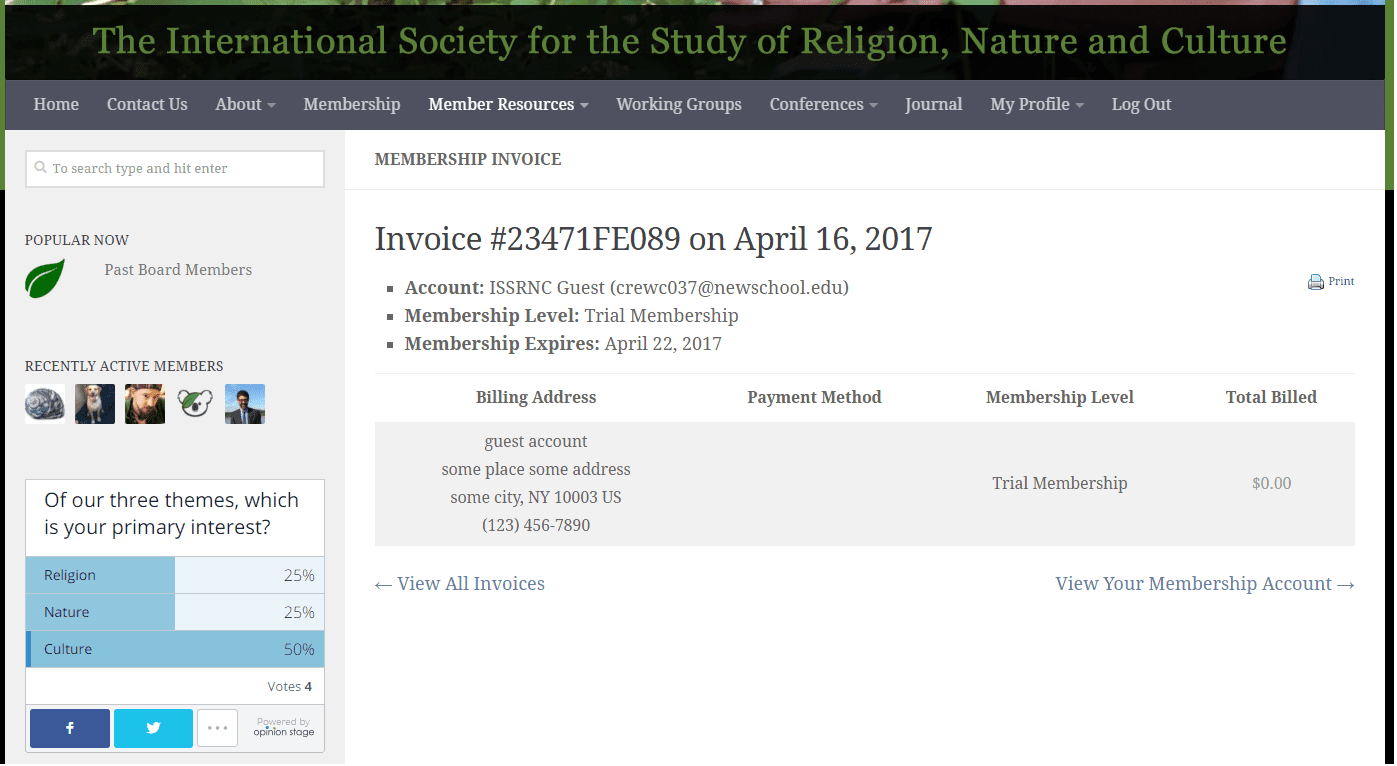
Under the “Past Invoice” section you can see all of your past memberships. Clicking on a past invoice will bring up more information about that specific membership. New members may not see any past invoices for the first year of their membership. Below is a sample of the information shown on each Past Invoice. Actual membership invoices will have additional payment information not shown in this example. You can print a copy of past invoices by clicking on the “Print” icon on the upper right of the page above the Total Billed.
Clicking on the “Edit Profile” will take you to the membership account settings page, where you can change a variety of options. For more details about these settings, please see the How-to Guide #2 – Account Profile.
How-To Guide #2 – Editing Account Profile
Q: How do I edit information about my membership account, like billing information or my shipping address for the JSRNC?
A: Those options can be changed in the “Edit Profile” option under your Account. Click the “Member Resources” tab to view the drop-down options, and select “My Account”. From there scroll down to the “Edit Profile” link under the “My Account” section. You will see a page like the one shown below.
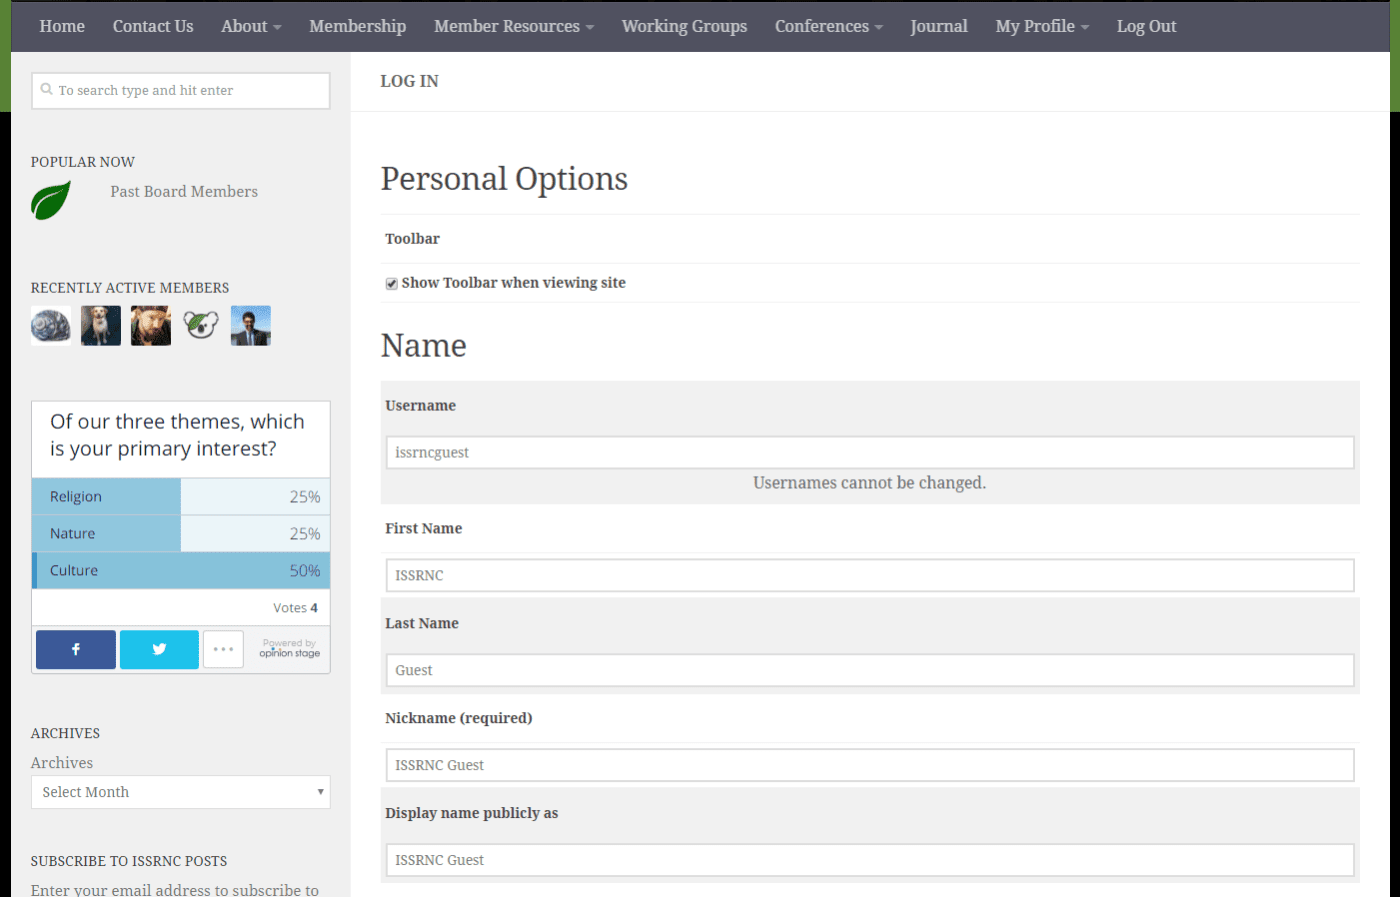
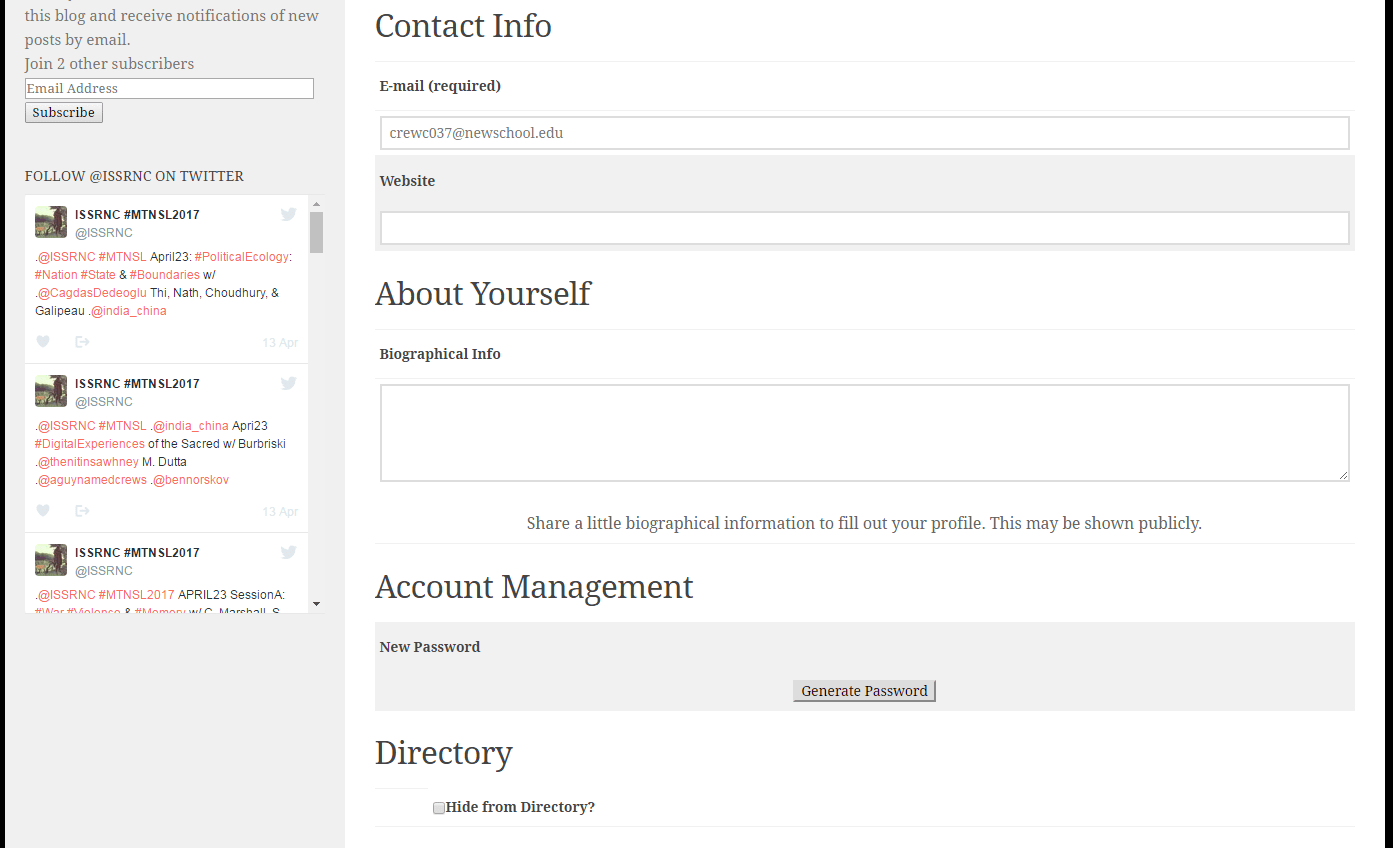
Here you can change some basic Account Profile setting, such as your First and Last Name, Nickname and Display name. Please note that at present usernames cannot be changed, as this is not allowed by the core WordPress software. The “Display name publicly as” will be what shows up when users post new content, such as a blog post. Clicking on this field will show a drop-down of possible display name combinations which can be selected, or a new one can be entered.
The information listed under “Contact Info” and “About Yourself” will show up on your individual Account Profile page along with a photo, if one was uploaded when you first created your account. You can choose to hide your Account Profile from the member directory by selecting “Hide from Directory.” This will only hide your Account Profile, not your main user profile, which is separate from the Account Profile. Please see the How-to Guide #3 – Editing User Profiles for more information.
** Please note the Account Profile information is different from the main User Profile displayed on the rest of the website, which includes a more detailed User Profile that is linked to the Buddypress member directory, groups, activity, and notifications, as well as displaying all of your primary and extended profile information.
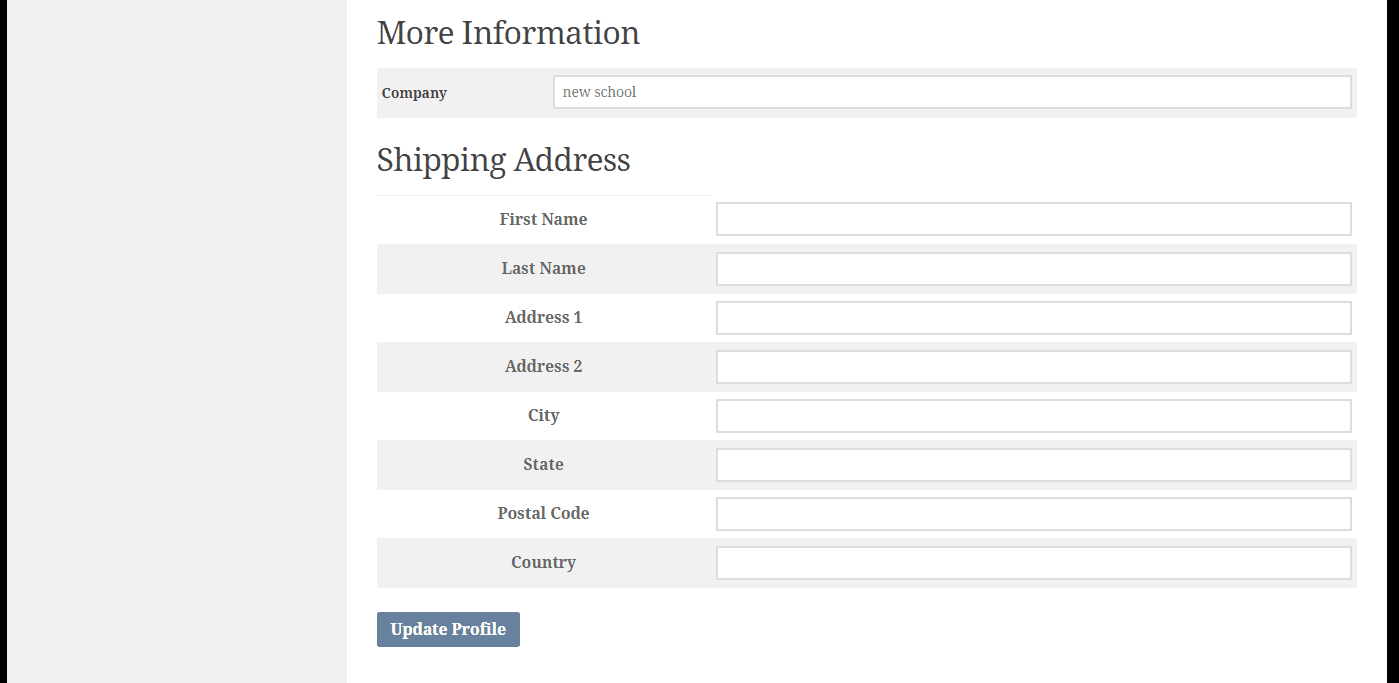
Once you have made all desired changes , be sure to click the “Update Profile” button to save your changes.
How-To Guide #3 – Editing User Profile
Q: How can I edit my user profile, change my picture, and add or change information on my user profile?
A: This can all be done through the “My Profile” tab in the main menu, which will become visible once you have logged into the site. Under the “My Profile” tab you can view your user profile, your groups, your friends, read and reply to any personal messages, view site activity, view notifications and edit your profile settings.
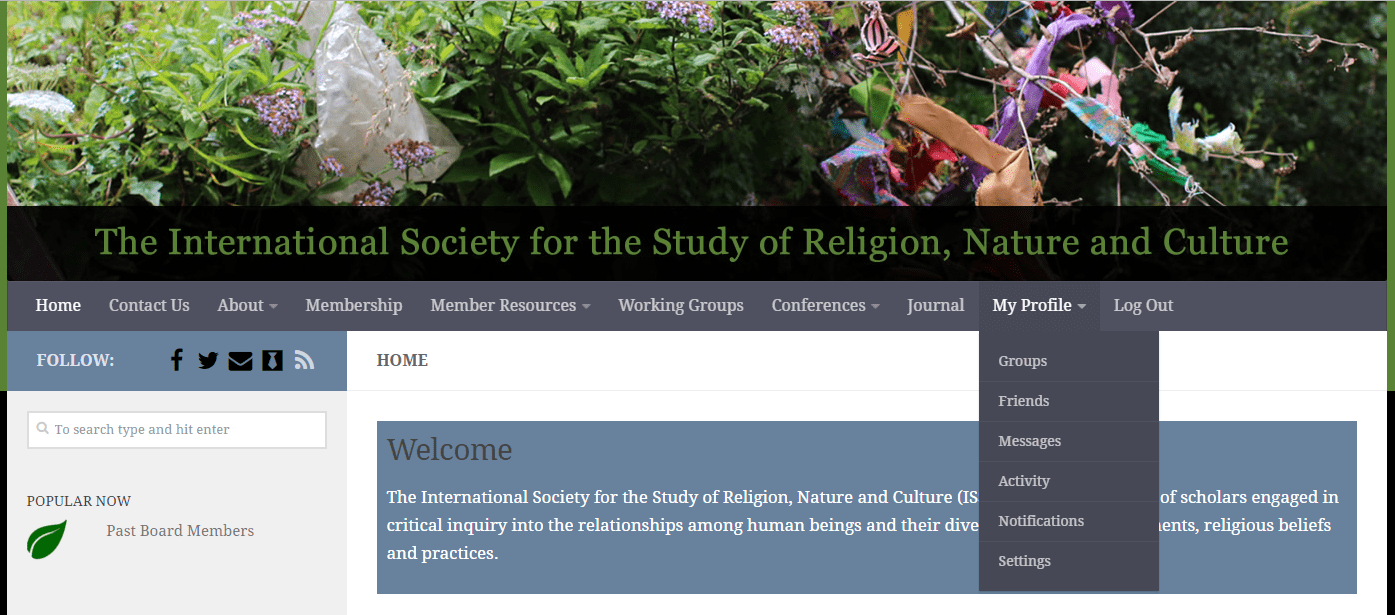
Clicking on the “My Profile” tab in the main menu will take you to your User Profile homepage. You will see a page like the one shown below.
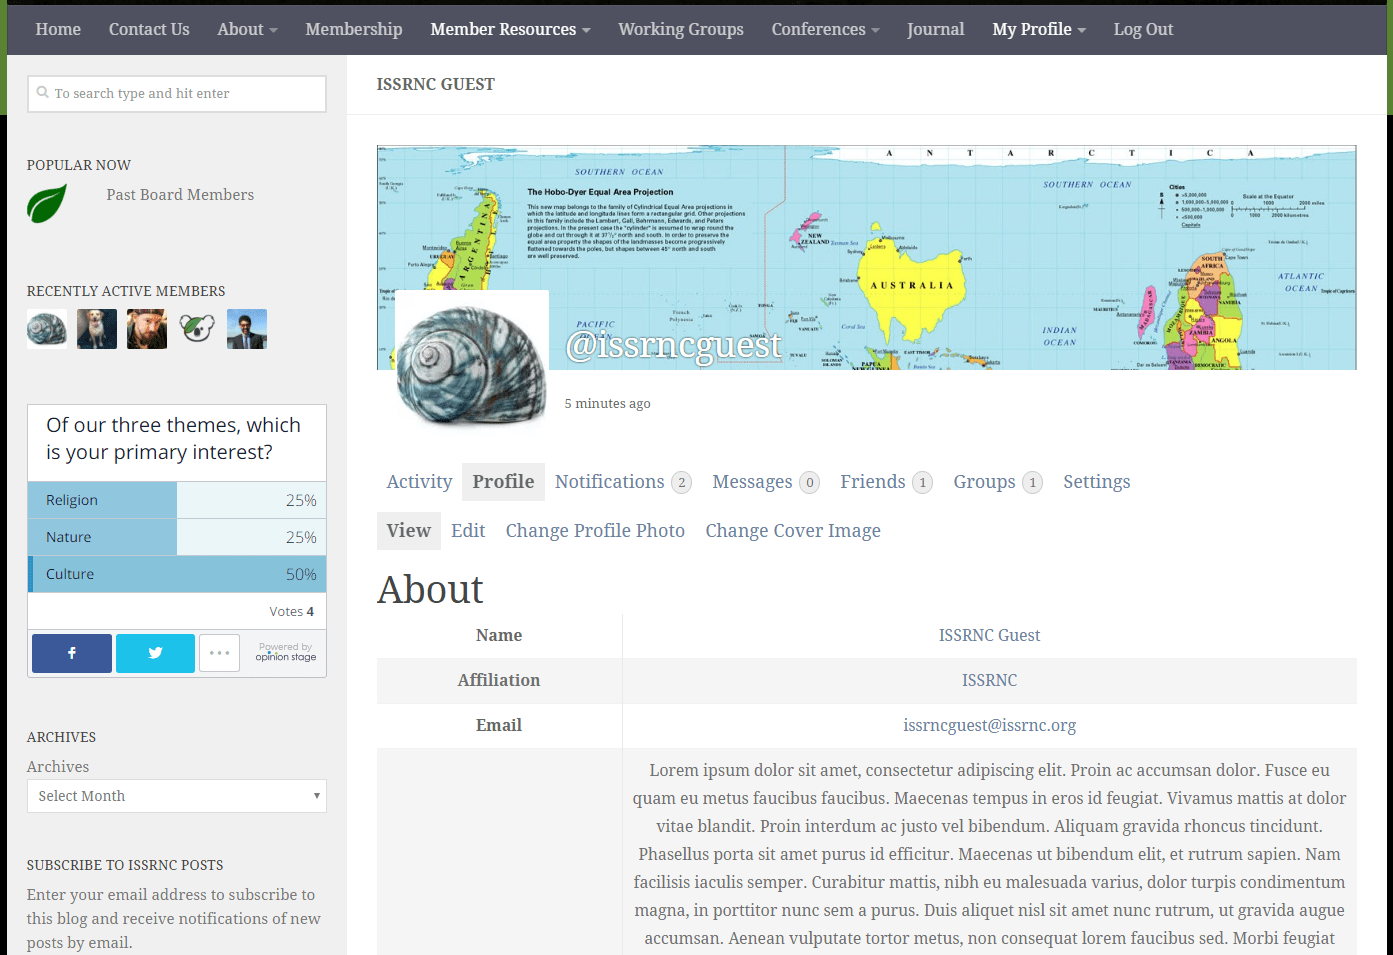
Here you can “View” your profile (the default view), “Edit” your profile, “Change Profile Photo” and “Change Cover Image.” The Profile Photo is the small square image (avatar) displayed for your profile, and across the website for all of your account activity. This is your “official” photo for your site wide account. The Cover Image is the long horizontal image in the background of your profile page, behind your Profile Photo.
By clicking the “Activity”, “Profile”, “Notifications”, “Messages”, “Members”, or “Groups” menu options you will switch between these different pages, all of which are linked to your User Profile, as well as all other members. If you have any new or unread activity in these sections, you will see a small number inside a circle to the right of those sections. Clicking on “Groups” will show you all the groups to which you have access. All of these pages can be sorted using the “Order By” option on the right side of the page. Options include “Last Active”, “Newly Registered”, and “Alphabetical”, and for some pages, “Newest First” or “Oldest First”. By going to the “Members” page you can view and search for all ISSRNC members and find their profiles.
Clicking on the “Settings” tab will take you to the User Profile settings page, where you can change your account password or email. Clicking on “Email” will take you to the email settings for the site, such as when to receive an email notification about site updates or new messages from other members. The “Profile Visibility” menu allows you to review and change all optional profile fields and who can view them across the site. This information can also be edited and changed under the Edit Profile” menu for each individual field.
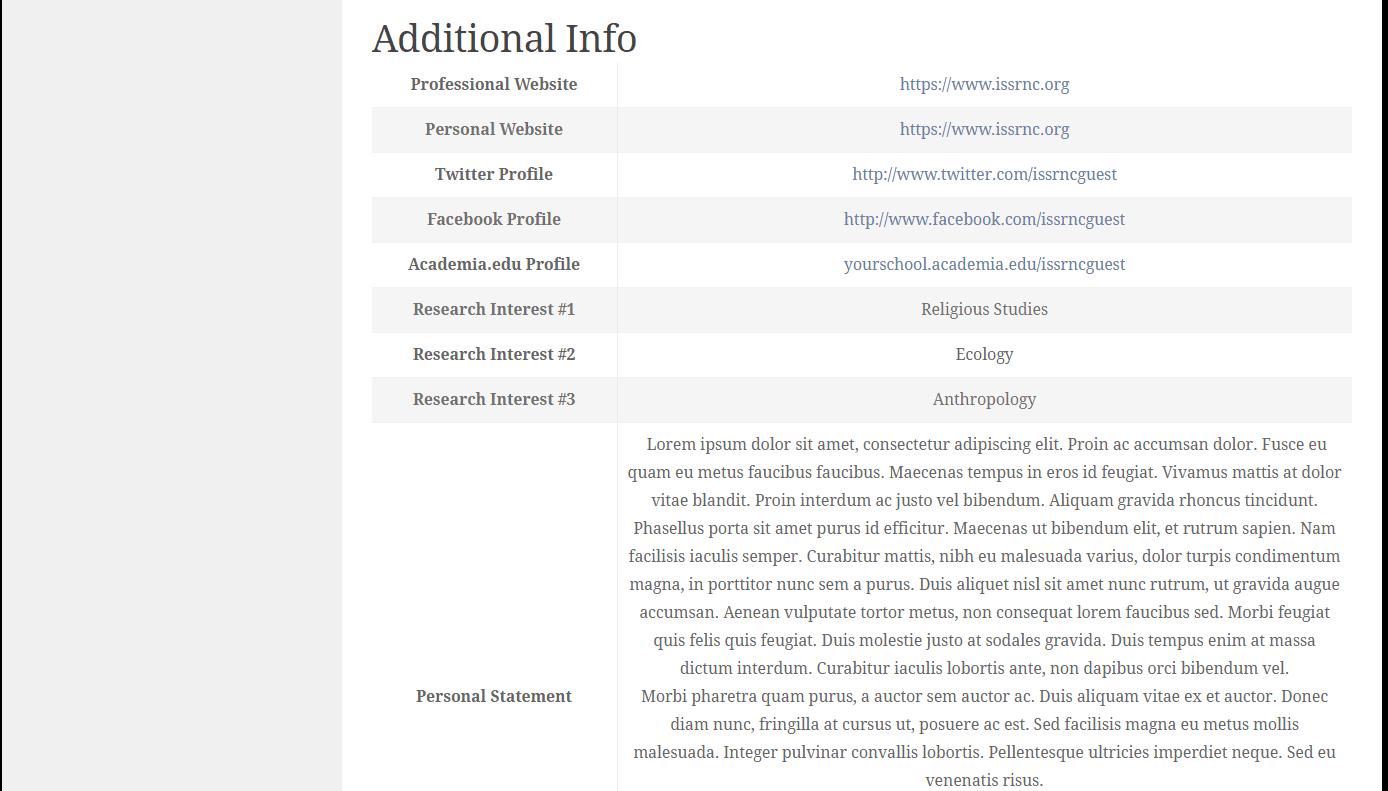
To edit this information, click the “Edit” option in the menu options, just above the About section. You will see a page like the one shown below.
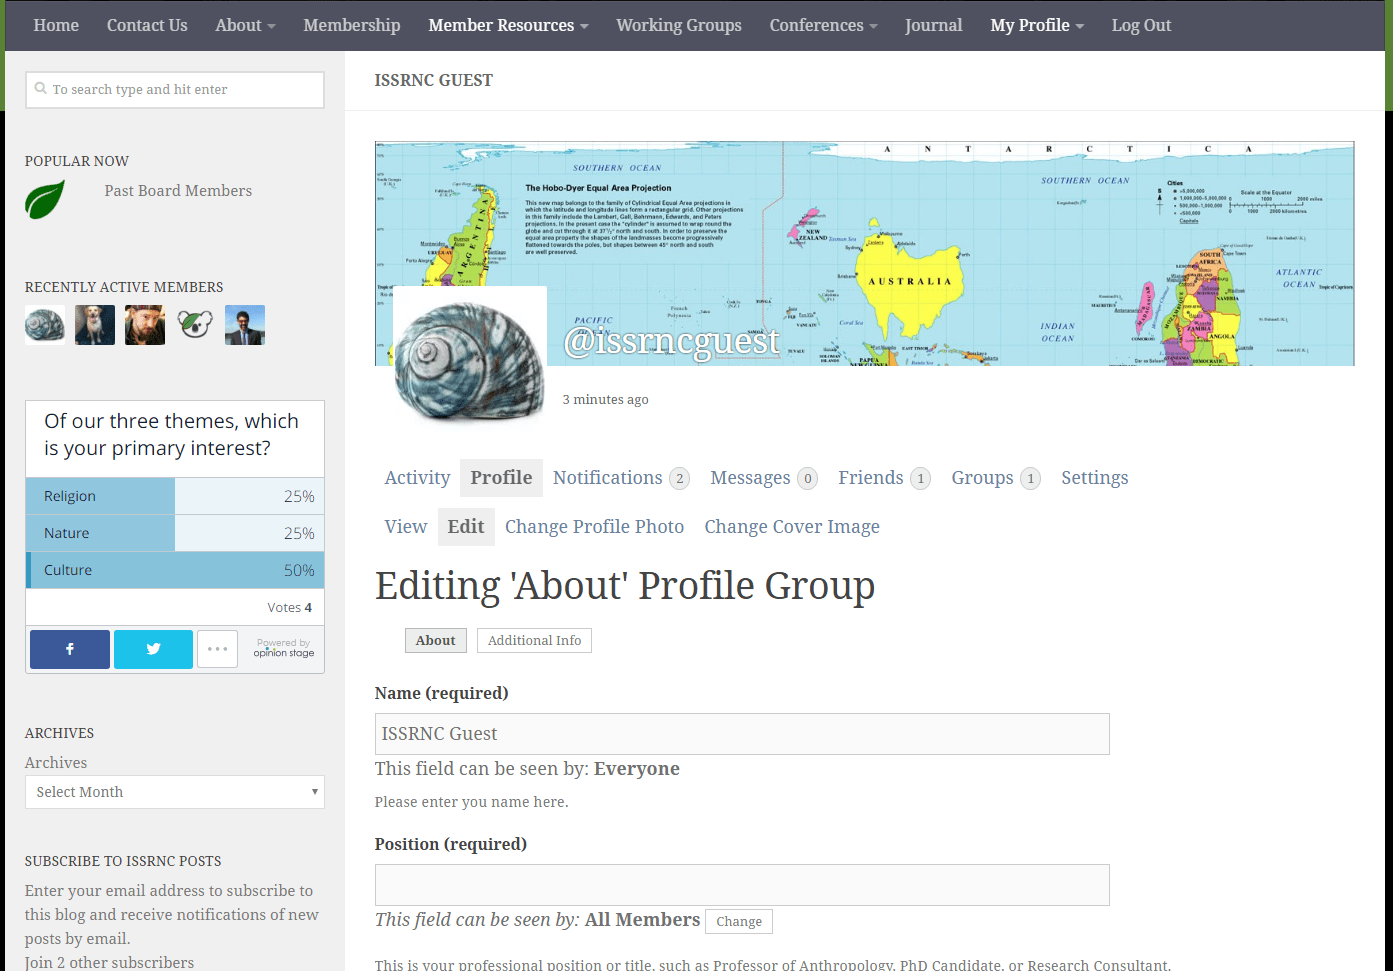
This page will allow you to edit the basic information which shows up in the “About” section of your profile. To edit the “Additional Information” shown on your profile after this basic information, click the “Additional Info” button next to the “About” button, just below where it say “Editing ‘About’ Profile Group.” Clicking on that will take you to your “Additional Info” profile section, where you can edit that information.
All fields except those which are mandatory (required) can be filled in or left blank, depending on the user’s preference. You can also select which information is visible on the website by clicking on the button that says “Change” under each field after the label “This field can be seen by: Everyone” Available options for displaying this information for each item are: “Everyone”, “Only Me”, “All Members”, or “My Friends”.
Once you have made any required changes to your “About” profile or “Additional Info” profile pages, make sure to click the “Save Changes” button at the bottom of the page.
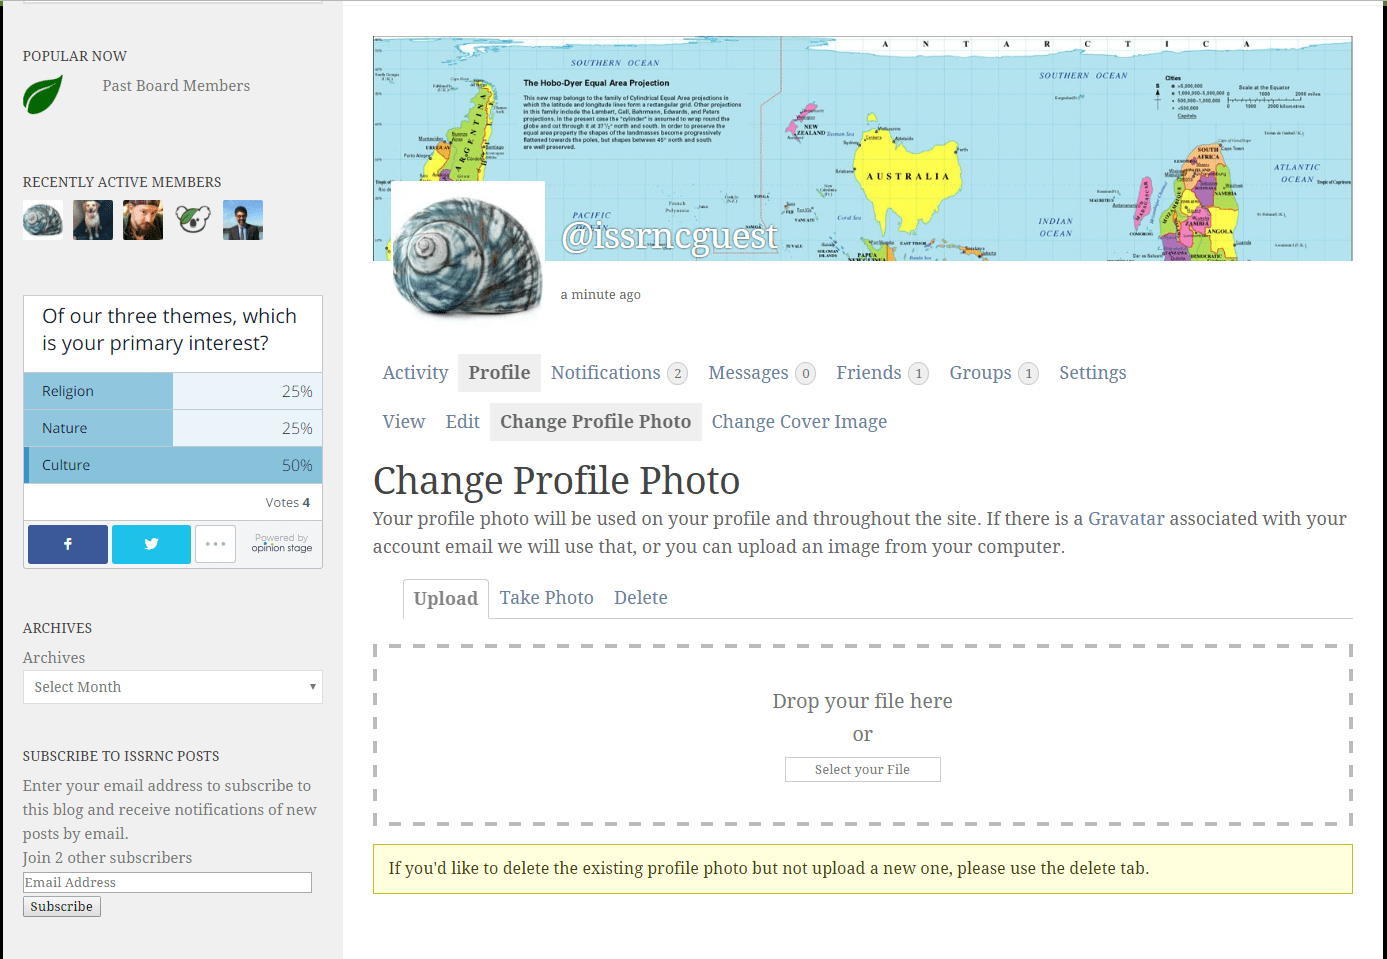
To add a “Profile Photo” or “Cover Image”, click on the option in the menu, which will open a new page where you can upload a new profile photo, or change your existing profile photo. You have the option to “Upload” a photo, “Take Photo” if you have a smartphone or computer with a camera, or “Delete” your existing photo. You can either Drag & Drop or browse to select your photo. If you use Gravatar for your online avatar management, and your ISSRNC account was setup with the same email as that linked to your Gravatar account, the site will use you Gravatar profile photo by default unless a new Profile Photo is uploaded here.
Once you select your new profile photo, you will be asked to crop the photo to an optimal size for display on the site. A small preview window to the right will show you how the final image will look based on the crop box. To revise the cropping, drag or resize the highlighted box in the center of your image to the desired size.
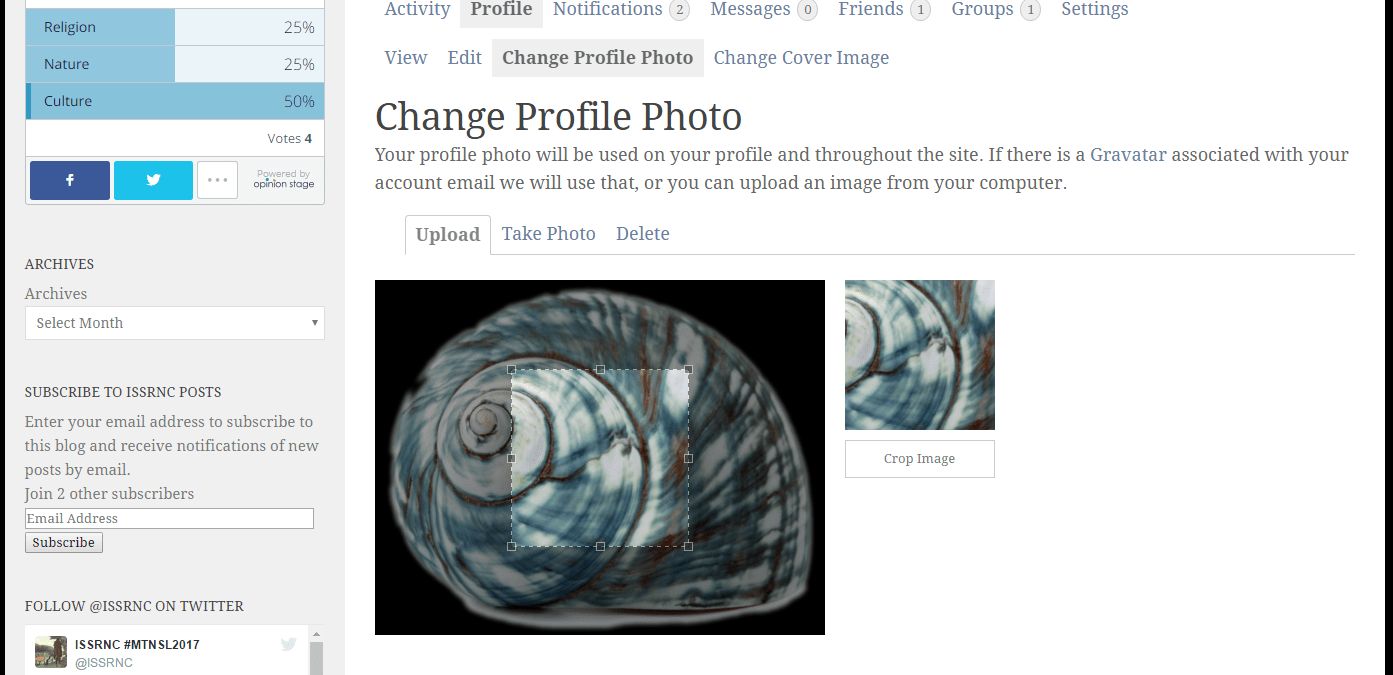
Once you are happy with how the image looks in the crop preview window, click the “Crop Image” button. You should receive a message that your profile photo was uploaded successfully. Your new profile photo is now in place!
Are you looking for a how-to guide that isn’t here, but you think it should be? Maybe you have an idea for a useful how-to guide, or even want to contribute one yourself. Just drop us a message on our contact page and let us know. We’re always happy to hear from our members.